Safeguarding Comes First: Consent and Photography Policies
Before you pick up a camera, you need a clear photography policy and proper consent from every family. This is not optional. Photographing children without appropriate consent is a safeguarding failure, and sharing those images publicly could expose you to complaints, regulatory action, or worse.
Written Consent
Collect written consent from every parent or guardian before photographing or filming their child. Your consent form should specify:
- What you will photograph (classes, events, performances)
- Where images may be used (website, social media, printed materials, press)
- How long images will be retained
- How parents can withdraw consent at any time
Many providers include photography consent as part of their enrolment form. If you use a management platform like AMES, you can build consent fields into the registration process so it is captured automatically and stored alongside the child's record.
Children Who Must Not Be Photographed
Some children must not be photographed under any circumstances. This includes looked-after children (in local authority care), children subject to court orders, and children whose parents have explicitly declined consent. Your staff must know who these children are and have a reliable system for ensuring they are not included in photographs. A simple visual marker system, such as a coloured wristband, can help instructors identify children who should not appear in images without drawing attention to individual circumstances.
Staff Devices
Staff should never use personal phones or cameras to photograph children at your sessions. Use a dedicated business device, and ensure images are transferred to secure storage and deleted from the device promptly. This protects both the children and your staff.
Smartphone vs Dedicated Camera
You do not need expensive equipment to take good marketing photos. A modern smartphone can produce excellent results, especially for social media, where the images will be viewed on small screens anyway.
When a Smartphone Is Enough
For social media posts, website banners, newsletters, and day-to-day content, a recent smartphone (iPhone 13 or later, Samsung Galaxy S21 or later, Google Pixel 6 or later) will produce images that are more than good enough. The cameras on these devices handle low light better than many dedicated cameras from a few years ago, and the convenience of having the phone in your pocket means you are more likely to capture spontaneous moments.
When to Use a Dedicated Camera
If you are producing printed brochures, large format displays, or professional video content for your website, a dedicated camera with interchangeable lenses will give you more control and higher resolution. A mirrorless camera with a fast lens (f/1.8 or wider) is ideal for indoor sports halls where light is limited. Budget around £500 to £1,200 for a capable entry-level mirrorless camera with a versatile lens.
Lighting in Challenging Venues
Activity providers often work in some of the most photographically challenging environments: sports halls with harsh fluorescent lighting, swimming pools with reflective water and mixed light, village halls with dim overhead bulbs, and outdoor spaces where conditions change by the hour.
Indoor Halls
Fluorescent lighting creates an unflattering greenish or yellowish colour cast. Set your camera or phone to the fluorescent white balance preset if available, or shoot in RAW format and correct the colour in editing. Position yourself so the light is behind you and falling on your subjects, rather than shooting into the light. If possible, shoot near windows where natural light supplements the artificial lighting.
Swimming Pools
Pool environments are tricky because of high humidity (which can fog lenses), reflections from the water surface, and mixed lighting from overhead lights and any natural light from windows. Wipe your lens frequently, shoot from a low angle to reduce surface reflections, and increase your shutter speed to freeze water droplets. A polarising filter on a dedicated camera can cut reflections dramatically.
Outdoor Spaces
Overcast days are actually ideal for photography. The clouds act as a giant diffuser, producing soft, even light without harsh shadows. Bright sunshine creates unflattering shadows on faces, so if you must shoot in direct sun, position subjects so the sun is behind them and use your phone's HDR mode to balance the exposure.
Capturing Action Shots
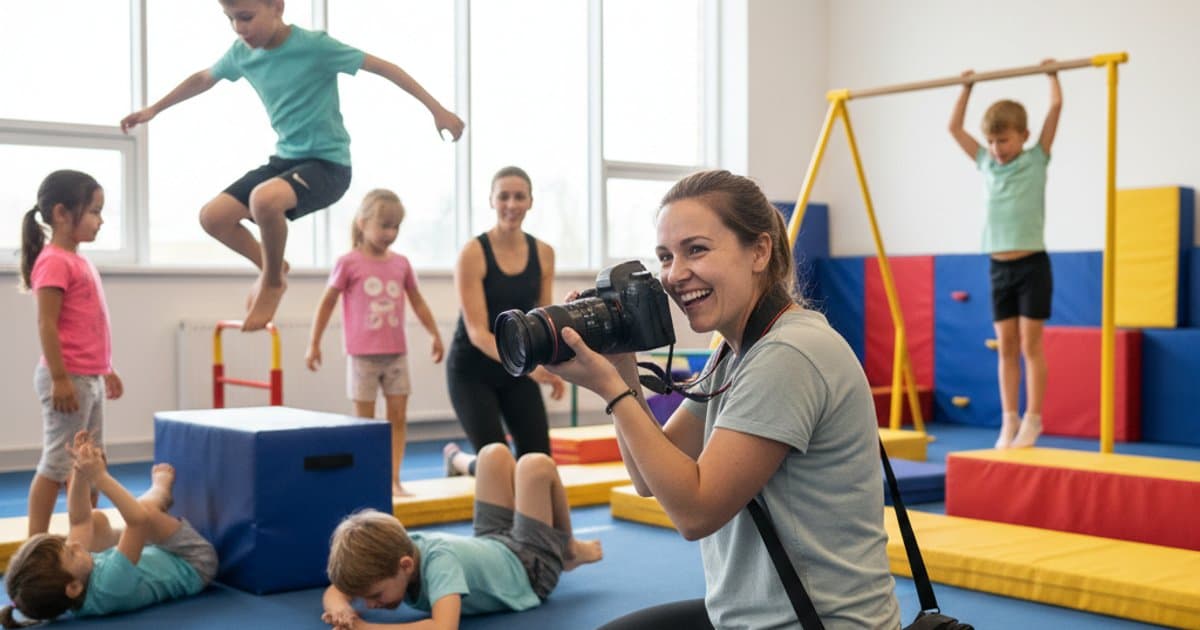
Static, posed photos have their place, but action shots convey energy, joy, and the reality of your classes far more effectively. A child mid-jump, a swimmer powering through the water, or a dancer in full extension tells a story that a lined-up group photo never will.
Technique Tips
- Use burst mode: Hold the shutter button to capture a rapid sequence, then choose the best frame afterwards. This is the single most effective technique for action shots.
- Anticipate the moment: Watch the activity and learn the pattern. If children jump at the end of a routine, have your camera ready before the jump happens.
- Get low: Photographs taken from a child's eye level are far more engaging than those shot from adult standing height. Kneel or crouch to create a more immersive perspective.
- Focus on faces: The most powerful images show emotion. A child's face lit up with concentration, pride, or delight is worth more than a technically perfect wide-angle shot of the whole class.
- Increase shutter speed: On a dedicated camera, use a shutter speed of at least 1/500th of a second for fast-moving activities. On a smartphone, burst mode handles this automatically.
Video for Activity Businesses
Video is increasingly important for social media and website content. Short clips of classes in action, parent testimonials, and facility tours can significantly increase enquiries.
Short-Form Content
For Instagram Reels, TikTok, and Facebook Stories, keep videos between 15 and 60 seconds. Show the best moments of a class: a child achieving something, a group laughing together, a dramatic finish to a routine. Add text overlays and music (using royalty-free tracks or the platform's built-in music library).
Parent Testimonials
A 30-second video of a parent explaining why they love your classes is more persuasive than any amount of written copy. Keep it simple: film in a quiet area after a class, use natural light, hold the phone horizontally, and ask one question: "What do you enjoy most about bringing your child here?" Let them answer naturally without a script.
Facility Tours
A walk-through video of your venue helps parents who have never visited feel comfortable before they book. Show the entrance, changing areas, the activity space, and any waiting areas. Keep it under two minutes and narrate as you go.
Stabilisation
Shaky video looks unprofessional. If you are filming handheld, walk slowly and smoothly. A basic smartphone gimbal (£30 to £80) makes a dramatic difference. Most modern phones also have built-in optical image stabilisation which helps, but a gimbal is a worthwhile investment if you plan to shoot video regularly.
Editing Apps and Tools
You do not need Photoshop to edit marketing images. Several free or inexpensive apps will handle everything you need.
Photo Editing
- Snapseed (free, iOS and Android): Excellent for quick adjustments to brightness, contrast, and colour. The selective editing tool lets you brighten faces without overexposing backgrounds.
- Lightroom Mobile (free with premium features): More powerful than Snapseed, with preset filters you can apply consistently across all your images for a cohesive look.
- Canva (free and paid tiers): Ideal for adding text overlays, creating social media graphics, and designing flyers using your photos.
Video Editing
- CapCut (free): Powerful mobile video editor with text, transitions, music, and speed controls. Excellent for short-form social content.
- iMovie (free, Apple devices): Simple and effective for longer videos like facility tours and testimonial compilations.
- DaVinci Resolve (free, desktop): Professional-grade editor if you want to produce polished website videos.
Social Media Image Sizes and Formats
Each platform has different optimal dimensions. Using the wrong size means your images get cropped awkwardly or appear blurry.
- Instagram feed post: 1080 x 1080 pixels (square) or 1080 x 1350 pixels (portrait, which takes up more screen space)
- Instagram/Facebook Story or Reel: 1080 x 1920 pixels (vertical)
- Facebook feed post: 1200 x 630 pixels (landscape)
- Website hero banner: 1920 x 1080 pixels minimum (landscape)
- Google Business Profile: 720 x 720 pixels minimum
When you edit photos for marketing, export at these sizes so they display sharply on each platform.
Stock Photography vs Real Imagery
Stock photos of smiling children in pristine studios look generic and parents can spot them immediately. Real photos of real children in your actual classes are infinitely more authentic and persuasive.
That said, there are situations where stock imagery can fill a gap: a new business that has not yet built a photo library, a blog post that needs a header image, or a social media post about a general topic. If you use stock, choose images that look natural and diverse, not over-produced. Sites like Unsplash and Pexels offer free, high-quality images. Avoid anything that looks staged or uses American-style settings if your audience is British parents.
Your long-term goal should be to replace every stock image on your website and social channels with real photos from your classes. Authentic imagery builds trust in a way that stock never can.
Building a Photo Library
Do not wait until you need a photo to take one. Build a library systematically so you always have fresh, relevant images available when you need them.
Schedule Regular Photo Sessions
Dedicate one session per month to focused photography. Choose a class with good lighting, ensure all consent forms are in place, and spend 20 to 30 minutes capturing a variety of shots: wide angles of the group, close-ups of individual children (with consent), equipment and venue details, and candid moments.
Organise Your Library
Create folders by date, activity type, and usage rights. Tag photos with which children have consent and which do not. When a family withdraws consent, you need to be able to find and remove their child's images quickly. A cloud storage service like Google Drive or Dropbox works well for small teams.
Seasonal Content
Capture images that reflect the seasons: children in summer kit for outdoor sessions, cosy indoor classes in winter, festive decorations in December, new starters in September. This gives you a bank of timely content for social media throughout the year.
Key Takeaways
- Always secure written consent before photographing children, and have a clear system for identifying those who must not be photographed.
- A modern smartphone is sufficient for most marketing photography. Invest in a dedicated camera only if you need print-quality or professional video.
- Master the basics: burst mode for action, low angles for engagement, and natural light wherever possible.
- Short-form video (15 to 60 seconds) is highly effective on social media. Parent testimonials and class clips drive enquiries.
- Use free editing tools like Snapseed, CapCut, and Canva to polish your content without a large budget.
- Prioritise real photos over stock. Authentic imagery of your actual classes builds trust that generic images cannot match.
- Build your library systematically with monthly photo sessions, organised storage, and seasonal variety.